Introduction
Ghee, a staple in Indian cooking, is a type of clarified butter that offers a rich, nutty flavor and countless culinary uses. The process of making ghee involves simmering unsalted butter until the milk solids at the bottom caramelize, producing a golden liquid. This homemade butter, also known as desi ghee, is highly valued for its ability to withstand high cooking temperatures without burning. Whether you use organic butter or grass-fed varieties, the result is a versatile cooking fat that’s perfect for various dishes. Once the ghee is done, you can strain it to remove the milk solids, resulting in a purer and more flavorful product.
An authentic homemade ghee recipe is easy to follow and can be made with minimal ingredients. Using unsalted butter to make ghee is essential, as it allows the milk solids to be removed and gives the final product its signature texture. From the moment the butter is melted, the ghee will continue to cook and develop its distinct nutty flavor. Whether used for frying or baking, ghee adds a depth of flavor that’s hard to match with other fats. This traditional Indian ingredient is also popular in modern kitchens, used in everything from avocado toast to keto-friendly dishes.
Key Takeaways
Ghee is a type of clarified butter with a rich, nutty flavor, commonly used in Indian cuisine and beyond for its high cooking temperature tolerance.
Making homemade ghee involves simmering unsalted butter until the milk solids are removed, creating a pure and flavorful cooking fat.
Ghee can be made easily at home using basic ingredients like unsalted butter and a heavy-bottomed pan, with options like the Instant Pot or slow cooker for convenience.
Ghee’s long shelf life and simple storage requirements make it a practical and versatile addition to any kitchen, with refrigeration optional.
The type of butter used, particularly unsalted butter, plays a critical role in ensuring the purity and quality of the ghee.
Ghee’s versatility makes it ideal for traditional and modern recipes, from Indian curries to keto-friendly dishes, offering a healthy and flavorful alternative to oils and butter.

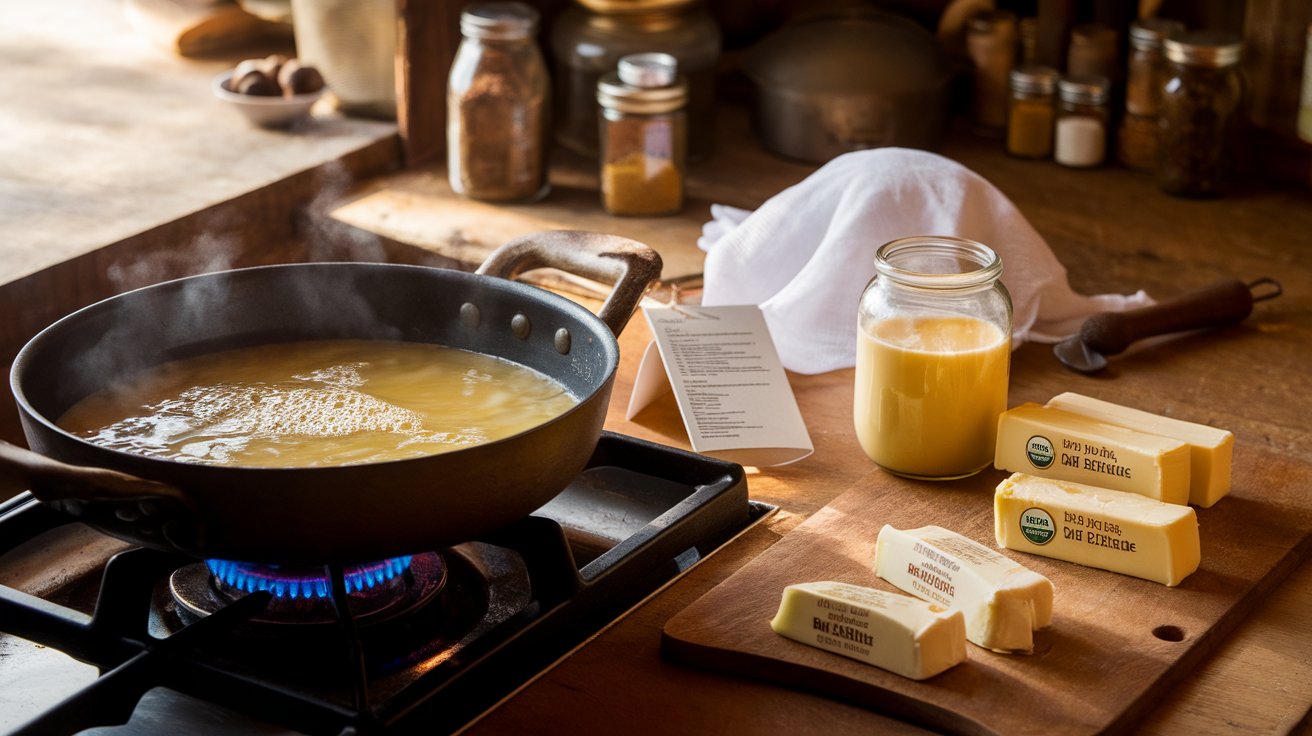
The Process of Making Ghee
Ghee, a staple in Indian cuisine, is a type of clarified butter known for its rich, nutty flavor. The process of making ghee made involves simmering kerrygold butter until the milk solids removed and caramelize, creating a golden liquid. Although it may seem time-consuming, try this recipe at home with a few essential tools. Once you pour the ghee, it delivers numerous benefits beyond flavor, often utilized in Ayurveda for healing properties. Melted butter has a higher smoke point than regular butter, making ghee every meal richer when cooking at high temperatures. Whether you use butter or experiment with ghee instead, learning how to make butter into ghee offers a versatile ingredient for any dish. Thank you so much for trying this delicious recipe!
Key Steps to Creating Authentic Homemade Ghee
1. Start with Quality Ingredients
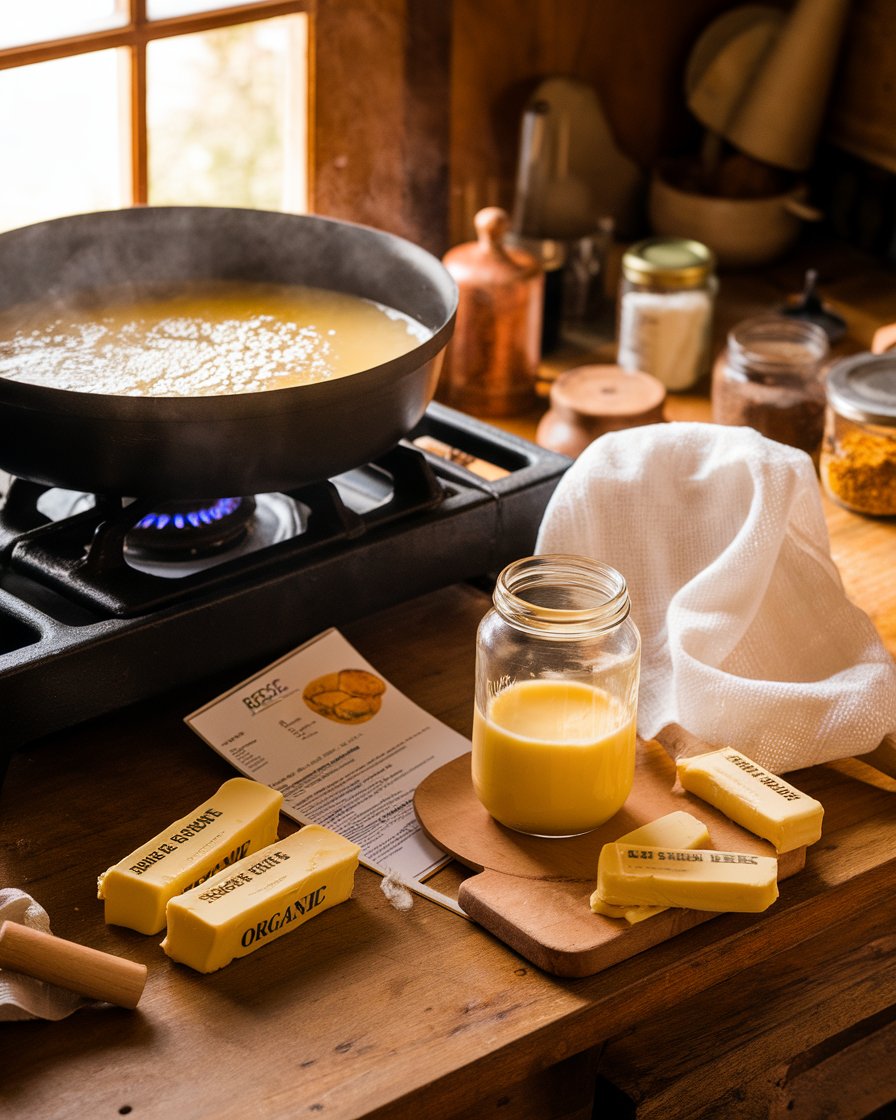
The foundation of authentic homemade ghee begins with selecting the best quality butter. Opt for unsalted butter, preferably organic or grass-fed, as this will enhance the flavor and nutritional benefits. Many traditional recipes use Kerrygold butter for its rich, creamy texture. High-quality butter ensures the ghee has a pure, rich taste with minimal additives.

2. Use a Heavy-Bottomed Pan
A heavy-bottomed pan is crucial for even heat distribution while making ghee. This ensures the butter melts slowly, allowing the milk solids to be removed without burning or sticking to the bottom. A high-quality pan prevents the ghee from developing an off-flavor and helps achieve the perfect golden-brown color.
3. Simmer Butter to Caramelize Solids
Once the butter melts, allow it to simmer on low heat. This is when the magic happens—the milk solids settle at the bottom and begin to caramelize. Stir occasionally to avoid burning, and watch as the ghee develops a rich nutty aroma. The transformation from butter to ghee is complete when the liquid turns a deep golden hue.
4. Strain the Ghee for Purity
After the ghee reaches the desired color and fragrance, let it cool slightly. Pour the ghee through a strainer or cheesecloth to remove the caramelized solids, leaving behind pure, clarified butter. This step is essential to achieving the smooth, rich texture of authentic ghee, ensuring that no solids remain.
5. Store in an Airtight Jar
Once strained, transfer the ghee to a glass jar or an airtight container. Homemade ghee can be stored at room temperature, thanks to its longer shelf life compared to regular butter. However, you can also refrigerate it for added longevity. The key is to keep it in a cool, dark place to preserve its rich flavor and health benefits.
6. Enjoy the Versatility of Ghee
Ghee is a versatile cooking fat with a high smoke point, perfect for sautéing, frying, and even baking. Its nutty, aromatic flavor enhances both sweet and savory dishes, making it a go-to ingredient for many traditional and modern recipes. From drizzling it over rice to using it in baked goods, ghee elevates any dish with its rich, buttery taste.
Key Ingredients and Equipment Needed

To make homemade ghee, you’ll need unsalted butter as your primary ingredient—preferably organic or grass-fed for the best flavor. Four sticks of unsalted butter will typically yield a small jar of ghee. You’ll also need a heavy-bottomed pan to ensure even heating without burning the butter. A strainer or cheesecloth is necessary to filter out the milk solids once the ghee is finished. Some people prefer to use cultured butter, which can add an extra depth of flavor. With these few key ingredients and equipment, you’ll be ready to make delicious ghee at home.
Step-by-Step Guide on How to Make Ghee
Start by melting your unsalted butter in the heavy-bottomed pan over medium heat. Once the butter melts completely, allow it to simmer for 20 to 25 minutes. During this time, the butter will begin to bubble as the milk solids separate and settle at the bottom of the pan. Keep an eye on the butter to prevent it from burning, and stir occasionally. The ghee is ready when it turns a deep golden color and releases a nutty aroma. Let it cool slightly before pouring it through a strainer into a glass jar. Store your homemade ghee at room temperature, and enjoy it in your cooking!
Ghee Variations and Cooking Techniques
Ghee can be prepared in various ways, each offering unique benefits and flavors. From making ghee in instant pot to traditional stovetop methods, there’s a technique for every preference. These approaches allow you to experiment with how ghee is used—whether you prefer a quicker, easy to make process or a slow, flavor-enhancing technique. Many people not only love making ghee for cooking but also appreciate the benefits of ghee, as it’s rich in antioxidants and vitamins. By using methods like butter to a heavy bottom pan or made with cultured butter, you can learn how to make ghee that suits your kitchen tools and time availability. Trying multiple ways will help you find the perfect amount of ghee for your cooking needs.
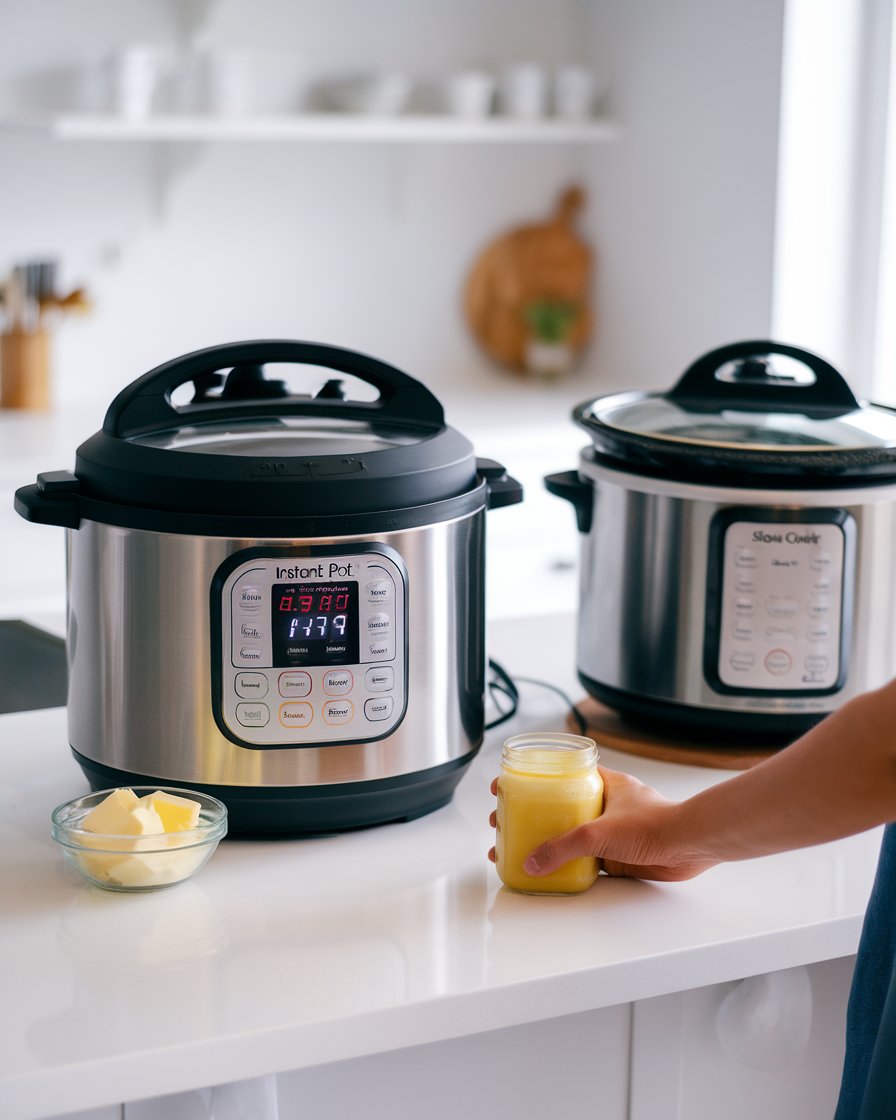
Case Study: Instant Pot vs. Traditional Stovetop Ghee Preparation
A recent study compared the effectiveness of the Instant Pot method and the traditional stovetop technique for making ghee. Conducted by a culinary school in India, the experiment aimed to determine which approach delivers the best results in terms of flavor, texture, and time efficiency. The Instant Pot method, which involved melting unsalted butter on sauté mode followed by pressure cooking, reduced the preparation time to just 15 minutes. On the other hand, the traditional stovetop method required 25-30 minutes of simmering unsalted butter, allowing for slow caramelization of the milk solids.

The study revealed that while both methods produced high-quality ghee, the Instant Pot method was favored for its convenience and time-saving benefits. However, the traditional stovetop method offered a richer, more robust flavor due to the longer caramelization process. This case study shows that both techniques are effective, but the choice depends on time availability and flavor preferences.
Instant Pot Ghee Method
For those looking for a quick and easy way to make ghee, the Instant Pot method is ideal. Start by placing four sticks of unsalted butter into the Instant Pot and set it to sauté mode to melt the butter. Once it’s fully melted, change the setting to “Pressure Cook” and let it cook for around 15 minutes. The pressure-cooking process helps clarify the butter with minimal supervision. After the cycle is complete, allow the pressure to release naturally before straining the ghee to remove any milk solids. This method simplifies the ghee-making process and saves time while still delivering rich, delicious homemade ghee.
Slow Cooker Ghee Alternative
If you prefer a slower, more hands-off approach, the slow cooker method is an excellent alternative. Place four sticks of butter in the slow cooker and set it on low heat. Allow the butter to cook for 4-6 hours, letting the milk solids naturally separate and caramelize. This gradual process enhances the flavor of the ghee without the need for constant monitoring. Once the ghee reaches a deep golden color and a nutty aroma fills the air, it’s ready to be strained. The slow cooker method produces rich, flavorful ghee with minimal effort, making it a great option for those who want to set it and forget it.
Ghee Quality and Storage

The quality and storage of ghee are crucial to maintaining its rich, nutty flavor and long shelf life. When you make ghee at home, the type of butter and how you store it will directly affect the ghee tastes, texture, and longevity. Whether you’re cooking with ghee using traditional recipes or incorporating it into your wellness routine, proper storage techniques will keep your ghee delicious and fresh. Understanding key factors, like using butter or ghee and ensuring your homemade ghee cools properly, can enhance the overall experience. Keep your recipe card handy, as knowing how to cook the butter and store it effectively will help preserve the nutritional benefits. Ghee is a must for every kitchen, offering versatility for various dishes and wellness practices.
Using Salted vs. Unsalted Butter

When making ghee, selecting the right type of butter is critical. While unsalted butter is the traditional choice, some may experiment with salted butter. Unsalted butter is recommended because it gives the purest form of clarified butter, free of additives like salt, which can alter the taste and texture. Salted butter, on the other hand, can introduce a more pronounced flavor but may affect the ghee’s shelf life, making it less stable for long-term storage. For the best homemade ghee recipe, stick with unsalted butter, preferably organic or grass-fed, to maintain the clean, rich flavor ghee is known for.
Shelf Life and Storage Tips for Ghee
Ghee is well-known for its impressive shelf life, especially when stored correctly. To ensure your ghee stays fresh, store it in an airtight container, away from direct sunlight and heat. At room temperature, ghee can last for several months without spoiling, thanks to the removal of milk solids during the clarification process. If you want to extend its freshness even further, refrigerating the ghee is an option, but not necessary if it’s used frequently. Proper storage techniques will help maintain the flavor and consistency of your ghee, ensuring it’s always ready for use in cooking or as a nutritious addition to your meals.
“Quality is never an accident; it is always the result of intelligent effort.” – John Ruskin
Cooking with Ghee

Ghee is not just a staple in traditional Indian cooking, but it’s also becoming a popular ingredient worldwide for its rich flavor and health benefits. Known for its high smoke point, ghee is ideal for cooking at higher temperatures without burning or losing nutritional value. Its nutty, aromatic flavor enhances both sweet and savory dishes, making it a versatile addition to any kitchen. From sautéing vegetables to frying meats, ghee can easily replace oils and butter, adding a depth of flavor that other fats often lack. With its ability to be used in a variety of cooking methods, ghee has become a must-have in many households.
Versatile Uses of Ghee
Ghee is an incredibly versatile fat that works in a wide range of recipes. It can be used for sautéing vegetables, frying, roasting, or even as a base for salad dressings. The nutty richness of ghee adds complexity to both savory and sweet dishes, making it an excellent alternative to regular butter or oil. Its high smoke point means it won’t burn easily, making it ideal for high-heat cooking, such as frying meats or making stir-fries. In baking, ghee provides a unique flavor that elevates cookies, cakes, and pastries. Whether you’re following traditional or modern recipes, ghee offers a flavorful and nutritious boost to your dishes.
Traditional and Modern Recipes with Ghee

Ghee is a cornerstone in many traditional Indian recipes, like dal, curries, and parathas, where it adds depth and richness. Beyond Indian cuisine, ghee has found its way into more modern and Western recipes, such as keto-friendly meals and even avocado toast. Because of its versatility, chefs are continuously exploring new ways to use ghee in both classic and contemporary dishes. From drizzling ghee over popcorn for a healthier snack to incorporating it into homemade salad dressings, this clarified butter is redefining how we approach cooking fats. Its ability to blend into both everyday and gourmet meals makes ghee an indispensable ingredient.
Conclusion
Ghee is a must-have ingredient in any kitchen, offering both versatility and rich flavor to countless recipes. Whether you follow an easy homemade ghee recipe or try making ghee in an Instant Pot, the process remains simple yet rewarding. With its high smoke point and ability to enhance both savory and sweet dishes, ghee offers a healthier alternative to butter or oil in your cooking. After you make clarified butter by simmering unsalted butter, simply skim off the milk solids, strain the ghee, and enjoy.
For the best results, use organic or grass-fed butter for a deeper flavor, and remember to store your ghee properly. Known as clarified butter, ghee will continue to improve your cooking as it resists burning during high-heat frying and sautéing. So next time you need a reliable fat for cooking or baking, ghee is the perfect option to elevate your meals and add a depth of flavor that stands out.